In this article we are going to see how to export unity code to android studio step by step.
Open Unity3d and select your project you want to export.
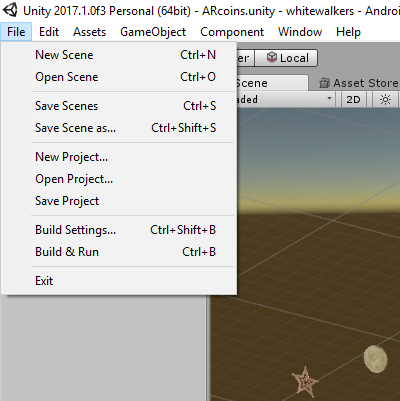
Click File-> Build Settings->


Step 1:
Open Unity3d and select your project you want to export.
Click File-> Build Settings->

Click on following check box
1.build system -Gradle
2.Export Project
3.Script debugging
Then click Export button.
Step 2:
Select the folder you want to export the project.

And Unity export the project into the respective folder,After exporting close unity and open android Studio.
Step 3:
After opening Android Studio close all other projects(File->close project).

Click -Import project(Eclipse ADT,Gradle,etc)
Step 4:
Select the folder of Exported unity project.
Select Build.gradle file then click OK.

Step 5:
A Google sync pop appears Click Ok button.

Android studio Starts building the project

Step 6:
An error appears in android studio.

Step 7:
Click Project->Gradle Script->Build.gradle file

A warning appears(code is marked with circle),click the line.
After clicking the link a bulb icon appears(a small icon appears to left of the warning).
Click the bulb icon or hit ALT+ENTER key.
Step 8:
After clicking the Bulb icon select Change to 2.2.0

Step 9:
After clicking (change to 2.2.0) the Dependencies code changes to 2.2.0
Then click "try Again"

Step 10:
After click("try again") Gradle starts building project.
And then a pop up appears.

Click Update Button.
Step 11:
Again Gradle starts building the project.
Once the build is done unity project is Exported to android Studio.
Note:
Android studio must be latest version.
Unity must be configured with android SDK.
Comments
Post a Comment